
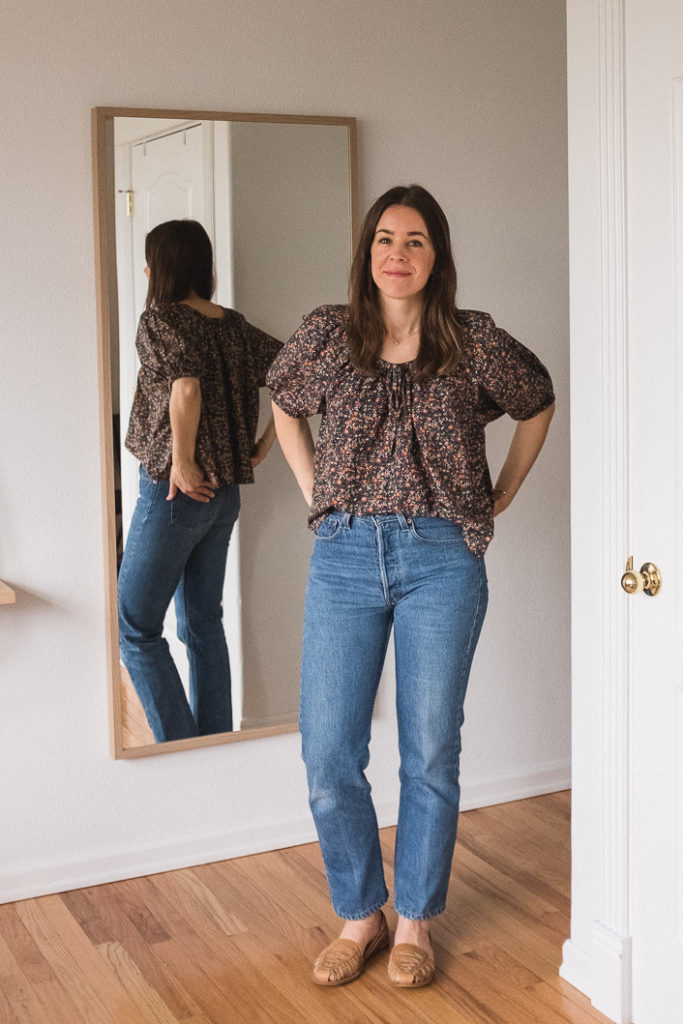
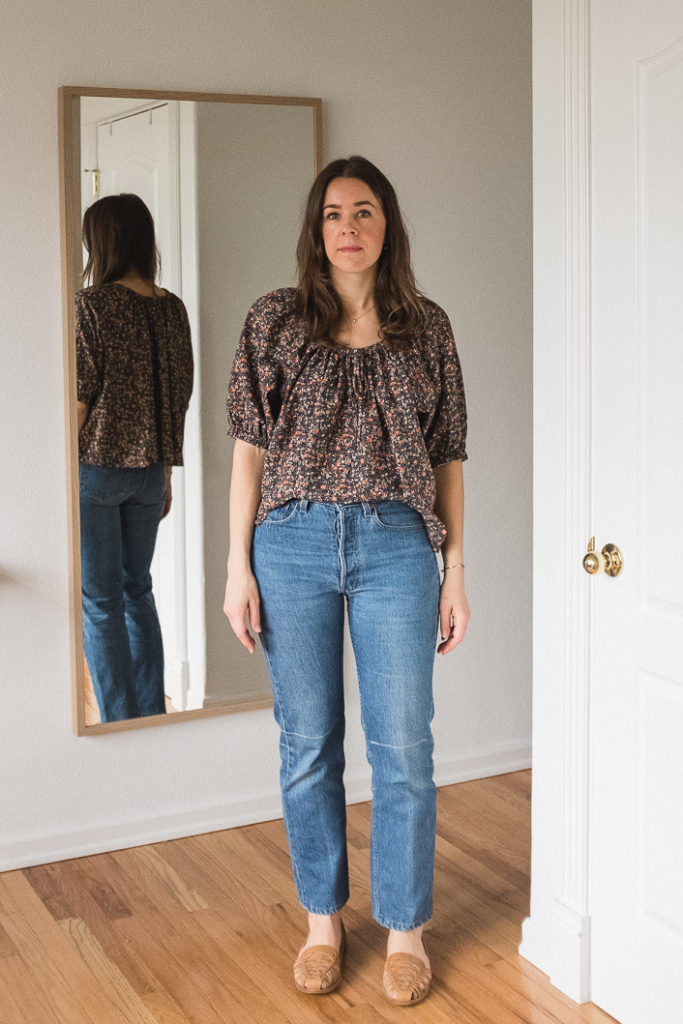
I recently bought a well-fitting pair of vintage Levi’s from my favorite, local denim hunting ground. I snatched them up because they had a nice form-fitting shape and a slightly higher rise than my other pairs.
However, after wearing them a few times, I noticed I didn’t LOVE them. They felt too ‘standard’ to me, and like they needed a little ‘spicing up.’
Using this photo as my inspiration I set off on a journey of bleaching and distressing my denim. I had done this once before, a few years ago, and luckily it was just like riding a bike. Except one thing I almost learned the hard way: always do your bleaching first, and your distressing second. The distressing is certainly the most laborious part of this DIY. You want to make sure you don’t screw up your jeans with the bleach (easy to do) before you invest the literal manpower in getting those rips just right.
I came to this conclusion halfway through my distressing, so, don’t be like me.
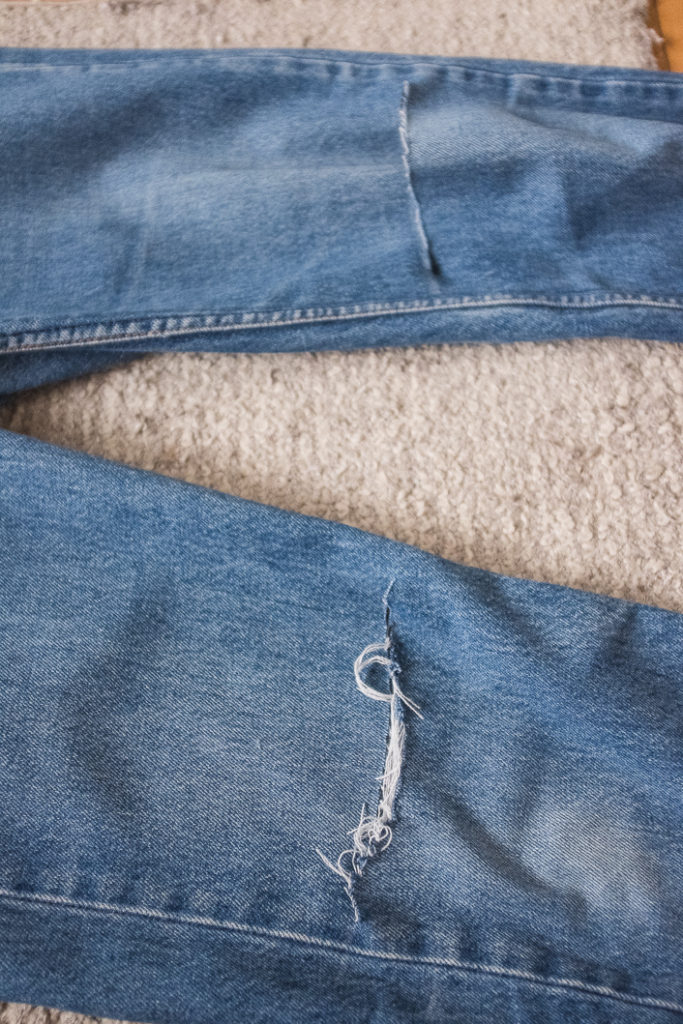
I figured the best way to position my holes was with my pants on, so I took some chalk and drew lines as starting points. I went a little high because holes always seem to hang low, and I figured too high was better than too low.

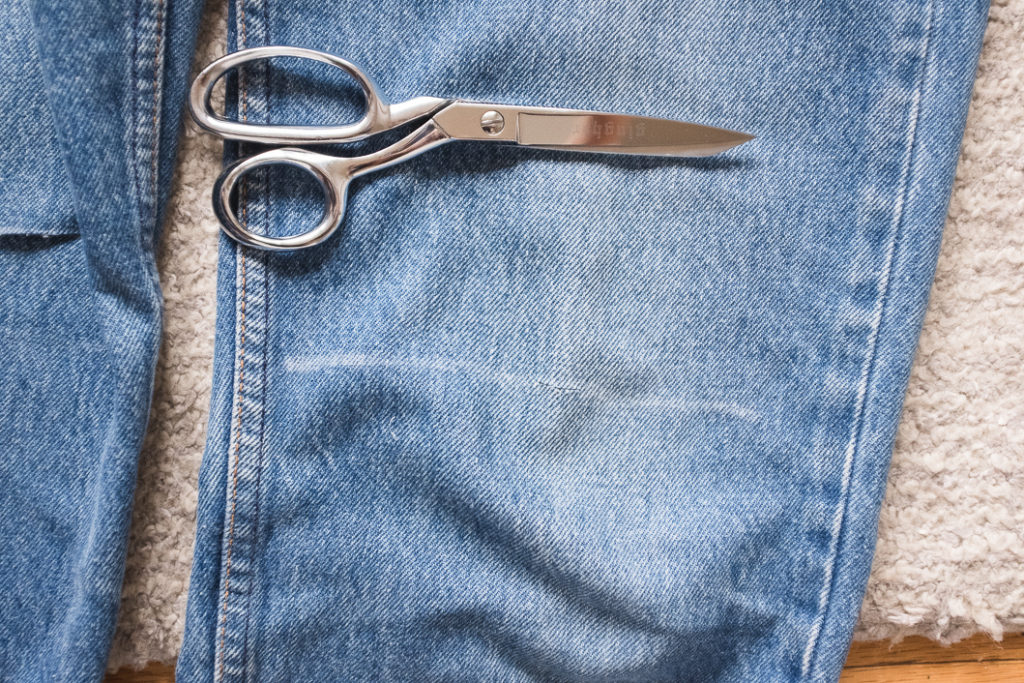
Next I took my very sharp fabric scissors and pinched the fabric perpendicular to the line and snipped a little hole. If you squint and tilt your head, you might be able to see it. From there I inserted my scissors parallel with the line and cut that sucker open.
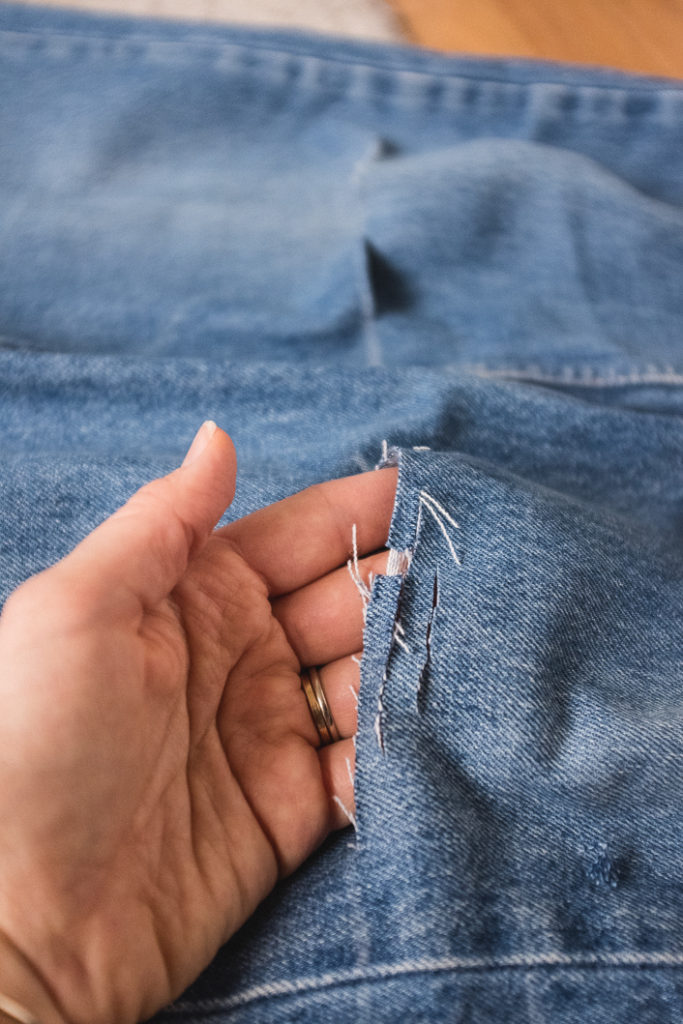
The next step was to create some more horizontal cuts just below the main one. These are best at least a half an inch apart, or the white horizontal threads won’t be very strong and will break (mine were a little too close). When creating these extra cuts, I try to differ them between knees so they are not identical. For example, one knee might have a few narrow subsequent cuts, and the other might have cuts that are nearly full width.
After making my incisions, it was time to ruffle the blue vertical threads with my fingertips until they become loose. Then I could start pulling them out, exposing the white horizontal threads. Some people find this easier to do with tweezers. (I told you this is labor-intensive people!)
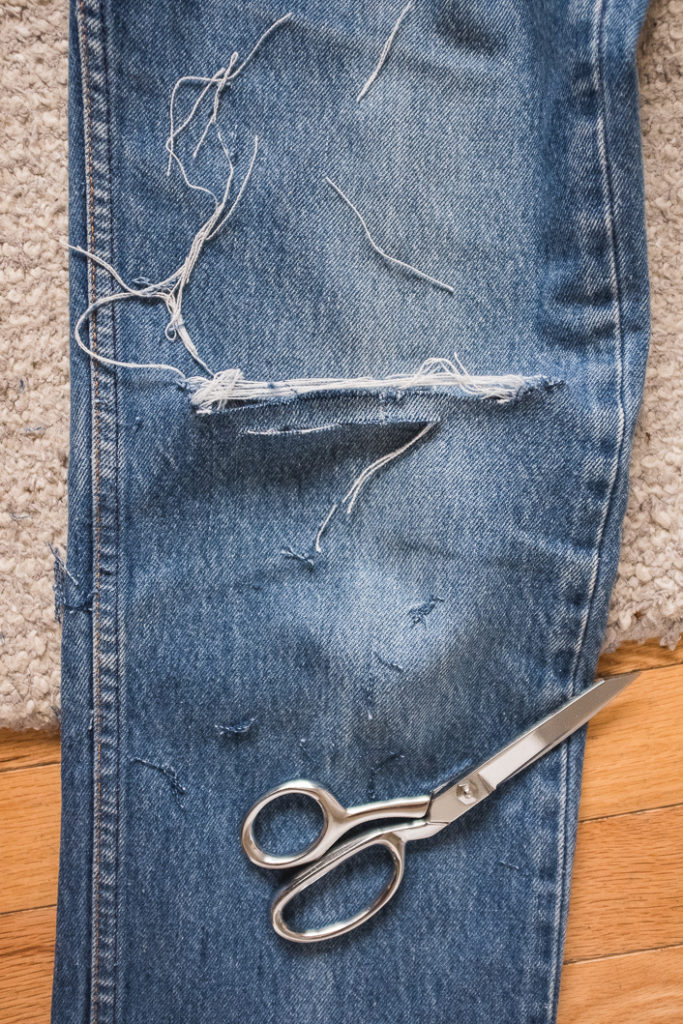
Next, I spent some time finessing the corners/edges between cuts to make them more rounded. I don’t like my cuts to look too blocky, or like stair steps, so I pulled up at the fibers to soften the shape.
Here’s the after product of the distressing. The fruits of my labor are barely obvious here, but all that will change after one trip through the wash!
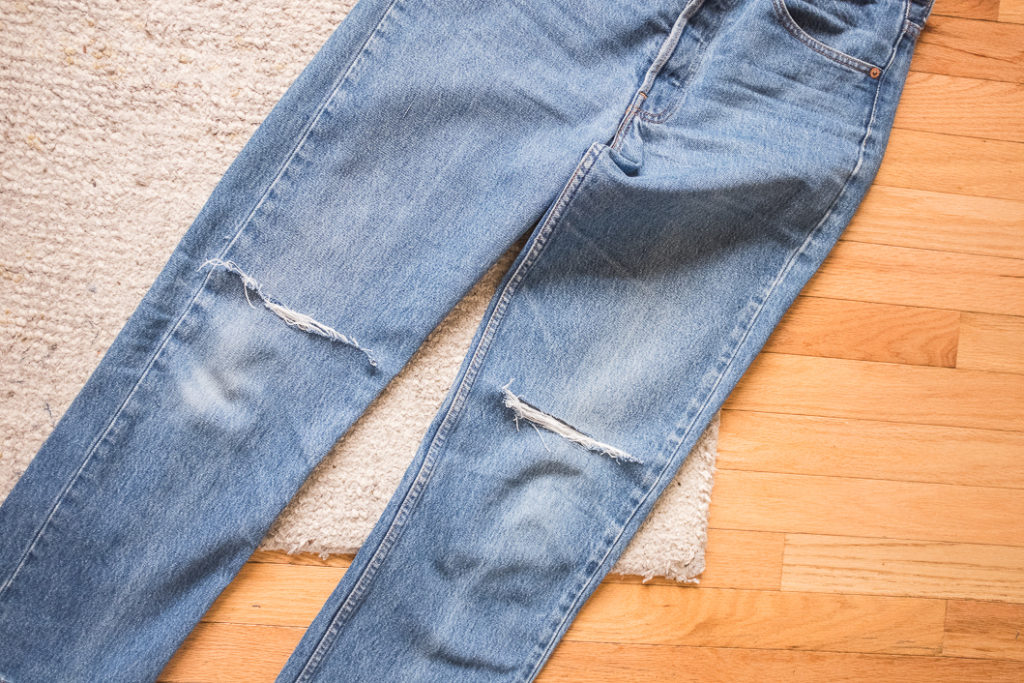
You can see them a little better here.
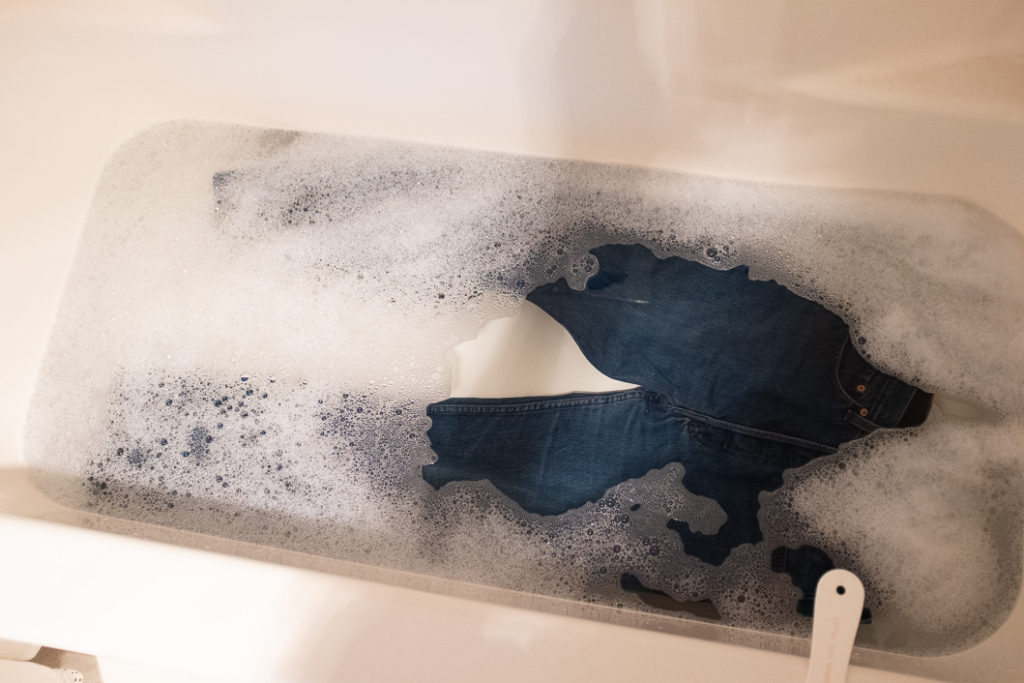
Please excuse the horrible bathtub photo, it’s the only one I took because I always seem to do things in a hurry.
Bleaching is very tricky in my experience. I have found the best way to get an even bleach is to have my garment lay as unwrinkled as possible. However, some websites I read recommended bleaching in a bucket and agitating the solution every few minutes. I have not tried this route. I like the bathtub for easy containment and rinsing. However, using the tub means you also have to use a LOT of bleach. I ended up doing a second round of bleaching because I did not have a strong enough mixture the first time. To bleach in a bathtub that is very partially filled (enough for the jeans to be covered and float a little bit) you need about 1/4 to 1/3 of a gallon of bleach. I mixed mine with hot water.
After my water/bleach mix was ready to go (I gave it a good stir with the handle of a bathroom accessory), I slid the jeans in, careful to poke (and hold) all the parts until they were submerged and stopped floating to the surface. The idea is that you want everything to be evenly submerged to ensure an even bleach.
I bleached the first time (with little results) for about two hours. The second time I bleached a little longer and checked on them about every hour. I recommend checking in closer intervals if your solution is stronger. I flipped mine about every 45 minutes, to try and avoid uneven distribution, and probably should have done it about every 30 minutes. I had some slight unevenness on the backside where the pockets of my jeans were touching the bottom of the tub for a prolonged amount of time. Thankfully I don’t think it’s too obvious in the end result.
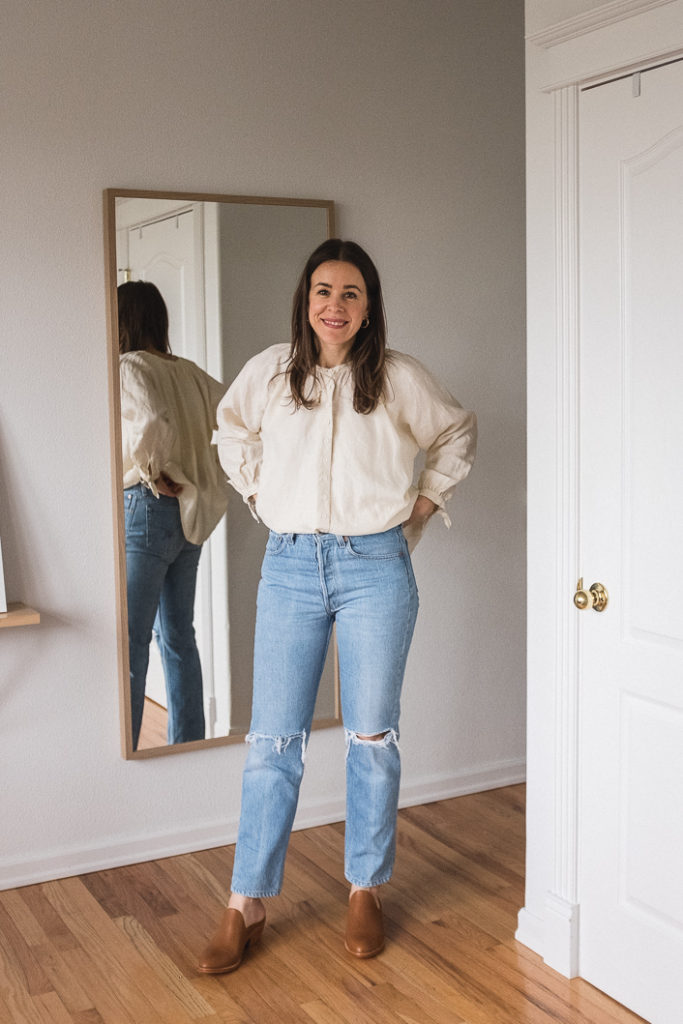
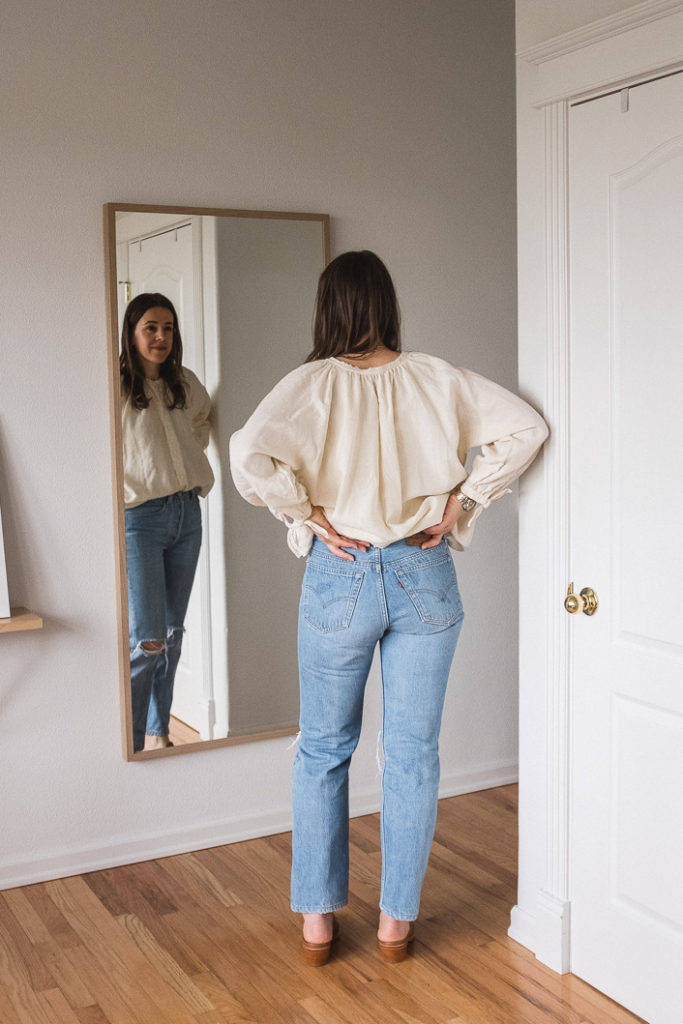
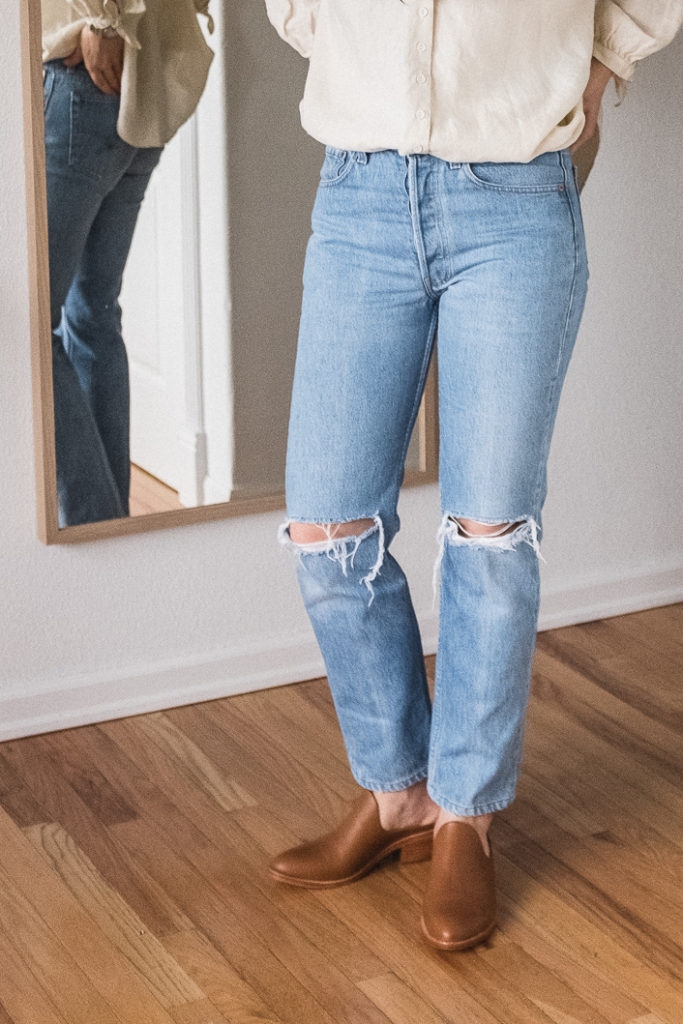
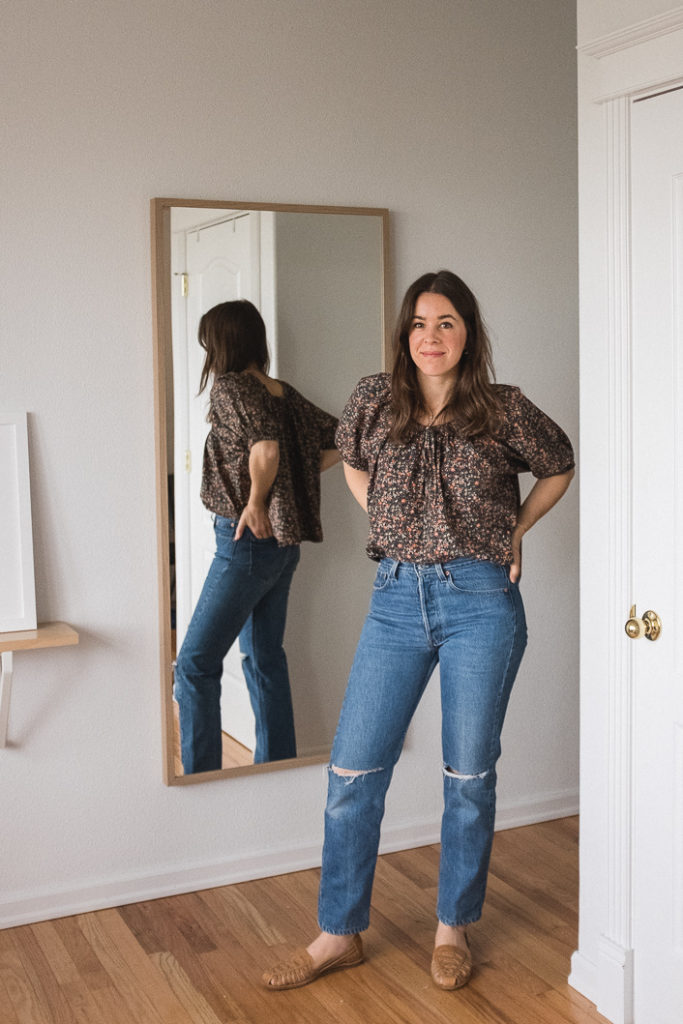
I’m wearing these as I write, and I am pretty darn happy with how they turned out! I was aiming for a bit lighter than this, so I may re-bleach at some point. But overall I love how much more interesting they are! The lighter color plus the holes make them a lot more edgy and fun.
I’m excited to style these through the spring and beyond! Give me all the plain white tees!

That’s quite the labour of love! They look great!
Thanks Sarah!
Oh my goodness Andrea, I’m obsessed with this post!! These are AMAZING!!! Please do more DIYs, I love them. And I’m totally going to do this to my pair of unworn jeans…. Love it!
Ah thanks for this feedback Ella, glad you loved the post! I hope it works out well for you!! You can see Krystal’s comment below, re: bleaching in a bucket. That might be easier!
Thank you for this step by step tutorial! I was just thinking that all of my jeans are the same wash and I was also on the hunt for lighter wash jeans!
Yayyyy! Keep us posted if you do it!!
They look so good! I’ve done the bucket method with denim shorts before, so I can attest that it works (but I did stir them every 20 minutes with a paint stick). I’d recommend to others that they pull the jeans out of the solution a tad earlier than they think, because wet denim looks darker than dry denim. It also took several washings to get the bleach smell out, so be prepared to wait a bit to wear them if you’re thinking of doing this!
Yes, good point! It’s really hard to tell how light they are when they’re wet! My bleach smell didn’t seem to linger too long, but that might have to do with my mixture ratio…
They turned out just delicious!
Thanks love!! I can’t stop wearing them!! I’m so happy to have jeans with holes in them again. ><
Just a note in case you weren’t aware….hot water dissipates bleach so you might get better and faster results with cool water… they look great though!
Oh boy!! I did not know that! Thanks for the helpful info Susan!

So good! I admire your bravery. I get so nervous thinking I’ll ruin them, but I think I want to try with my denim shorts for summer. I’ll have your virtually hold my hand through it :)
xo,
Paige
These look great!! I always end up with blotchiness. I guess I need to stir/flip them more frequently!